BLOGS

Blog Image
Dec 21, 2021
Save money by insulating your home

Did you know that up to 25% of the overall heat loss of UK houses escapes through the roof?

The good news is that it is the easiest place to tackle when it comes to insulating your home. The Energy Saving Trust estimates that installing loft insulation up to 270mm can save up to £590 in energy bills per year.

Do I need to insulate?

You might be thinking, how do you know whether you need to insulate?

UK Building Regualtions state that properties should have a minimum of 270mm of insulation in a loft (350mm for Scotland). This generally means that there will be 100mm of insulation in between the joists and then a minimum of 170mm laid on top at right angles, however new properties tend to be built with up to 500mm of insulation in the loft (the thicker the insulation, the more energy efficient your loft will be).

Advantages of Knauf Insulation, stocked at M&J

Our Knauff Loft Roll 44 is specifically designed for use in the loft at ceiling level.

Our Glass Mineral Wool insulation is non-combustible and made using recycled slass. It is also manufactured using our unique bio-based binder, ECOSE Technology, which contains no formaldehyde or phenol. This makes our insulation soft to touch and means it generates low levels of dust and VOCs (volatile organic compounds)

Our insulation is also compressed packed and lightweight, so that you won't struggle getting it into your car or up to the loft-just make sure you open the pack up there!

Our Loft Roll is 'combi-cut' which is pre-perforated to make it cutting to a sizes easier for you!

Installing Insulation

By ensuring you have the correct level of insulation in your loft, you will be able to enjoy a more energy efficient and comfortable home whilst also knowing you are reducing your monthly energy bills.

Installing insulation in your loft can seem like a daunting prospect, however we have created a simple insulation installation guide to walk you through each step, which is available to view by clicking here.

Blog Image
Dec 21, 2021
Cobble Setts

Create enchantment and allure to your outdoor by asking about our Cobble Setts.

Each piece of Cobble Sett undergoes our ageing process to create a soft distressed finish. The rustic and worn edges create a quaint feel which makes a beautiful addition to any garden.

Cobble Setts beautifully enhance the classic charming olde worlde Rumbled Cobble paving range. However, combined with the elegant, sophisticated Smooth Edge Strathmore paving will produce a striking wow factor.

Whether used as a decorative border around other pavers or on their own to create a bespoke feature our Cobble Setts will transform any driveway or outdoor entertaining area.

- Weathering process

- Creates a quaint feel

- Complements Rumbled Cobble Paving

- Produces striking wow factor when combined with Smooth Edge Strathmore paving

- Perfect for borders

 Click here to view our range of block paving and setts.

Blog Image
Dec 21, 2021
Our Warehouse Storage

Timber and PVC are very common construction materials. However, unlike other common building items like cement, bricks and blocks, storing and transporting timber requires a lot of care and proper handling. If not handled and stored correctly, the quality of these products can deteriorate much faster, leading to waste.

Our MDF, Redwood, Oak and Meranti facings, skirtings and finishing timbers are stored within 'pigeonholed' racking alongside our PVC fascia, soffit and trim range.

This means that each section size sits within its own defined space and helps us keep the product flat and protected from coming into contact with unnecessary damage or dirt.

Whilst timber can be prone to bowing from time to time, by keeping the product lying flat within our racking we keep that to a minimum, ensuring the product is fit for purpose when it arrives to your home or site. Some merchants opt to store timber and other longer products vertically, but this can vastly increase the chances of bowing or warping and increases the likelihood of an accident happening within the warehouse environment.

Our staff also find this type of racking particularly helpful, and it allows for easy manual selection of the product picked by the customer.

You can browse our timber range here and have a flick through our PVC Roofline products here, with the confidence that we're storing them in the best possible condition.

Blog Image
Dec 21, 2021
The DIYers Guide to Plasterboard

If you’re self-building, or tackling a room refurb by yourself, the range of plasterboard types available can be mindboggling.

Tapered or square edge? Moisture resistant or vapour-check? Don’t worry – we’ve got you covered.

Edges

Before we get into the nitty gritty, it’s important to know which edge type is best for your project.

Plasterboard panels come in two finishes – square-edged and tapered. Which one you choose will be dictated by the application.

To put it simply, tapered is commonly used for walls, as it’s narrower edge profile makes joining and skimming easier. Square edge plasterboard is usually used for ceiling or areas with a textured finish, as the seams between the sheets will be less visible.

Tapered-Edge


Pros

  • Ideal for walls - invisible joints under paint, and a great surface for tiles
  • No skimming required
  • Neater result


Cons

  • Slightly more expensive than square edge
  • Not suitable for corners

Square-Edge


Pros

  • Great for ceilings
  • Cheaper than tapered edge plasterboard
  • Easier to install


Cons

  • Requires skimming
  • Joints can remain visible


When it comes to choosing the best plasterboard, tapered edges will make for a faster installation – great for larger projects. If price is a concern, or you are installing boards on a ceiling, a square edge is usually the best choice for the job.

Standard Plasterboard

Your standard grey/ivory plasterboard is ideal for a plaster finish, and is even suitable for decorating directly on top of.

It comes in a range of thicknesses (usually 9.5mm – 12.5mm) and sizes so it’s extremely versatile for use in partitions, walls and ceilings, and is the ideal choice for most residential projects.

You won’t need any special tools to cut it – a Stanley knife and a straight edge to score, followed by a careful snap will do the trick.

Fire-Resistant Plasterboard

Fire-Resistant plasterboard (sometimes referred to as fire rated, or fireproof plasterboard), are, unsurprisingly, more resistant to flames than the standard panels.

Because they’re made from a mix of materials like glass, 12.5mm boards can you 30 mins fire protection with thicker boards giving longer protection, making them ideal for use in kitchens and garages, and even commercial spaces like offices and shopping centres, which may have more stringent fire regulations.

Fire-resistant plasterboards are usually pink to make them easy to identify, and come in tapered or square edges. They’re even suitable for direct decoration, so you can plaster, paint on tile directly on top.

Moisture-Resistant

Identified by it’s green face, moisture-resistant boards are ideal for rooms with high humidity, such as bathrooms, walk-in showers and kitchens. As the boards prevent moisture from entering the walls and ceilings, you’ll find fewer damp related issues and snagging costs.

Although you can decorate directly on top of moisture-resistant boards, using a bonding agent will allow plaster to grip onto the surface and remain in place.

Vapour Check Panels

Used in areas where hot meets cold (such as the internal faces of external walls, or pitched roofs in loft conversion) and where a vapour barrier is needed to prevent moisture entering the building, Vapour Check Panels look just like standard plasterboard, with an added foil layer on the back.

The foil layer prevents condensation forming in external walls and roof spaces, which happens when warm air meets the cold, and can cause damp and mould.

Thermal Laminates

Thermal plasterboard is standard plasterboard with a backing layer of some type of insulation – often polystyrene or polyurethane foam. They’re designed to be used when lining external walls or ceilings, and some even include a vapour check layer for those rooms where dampness may cause issues.

Because of the many layers involved, thermal plasterboard can often be a lot more expensive than standard plasterboard, however carries the benefits of three products in one.  


If you have any questions about the right type of plasterboard for your project, please get in touch, or view our full range on our website.

Blog Image
Dec 21, 2021
Still on the fence? Exploring the benefits of composite fencing

Traditional wooden fences have withstood the test of time, enduring countless storms, gusty winds, and layers upon of protective stains and sealants. However, in recent years, there's been a buzz around composite fencing, and everyone seems to be raving about its superiority. So, what's all the fuss about the new kid on the block?

Composite fencing is a game-changer, and it's here to stay. Crafted from a blend of wood fibres and recycled plastic, this innovative fencing solution offers a whole range of benefits, making composite fencing a smart choice for homeowners:

1. Durability and Low Maintenance: The Winning Combo

Imagine a fence that defies the elements, stands strong against rot, resists warping, and laughs in the face of insect damage.

That's the promise of composite fencing.

It's a fantastic long-term investment that can save you time, effort, and money. Unlike traditional wood fencing, composite fences don't demand endless cycles of painting, staining, or sealing. Once installed, you can rest easy knowing your fence will look great for years to come.

2. A Green Choice for Eco-Conscious Homeowners

If you’re trying to be a little more eco-friendly, composite fencing should be on your radar.

By harnessing the power of recycled materials, it significantly reduces the demand for virgin wood and plastic, making a meaningful contribution to the preservation of natural resources.

It also helps in reducing landfill waste, making it a responsible choice for the environment. When you opt for composite fencing, you're not just protecting your property; you're also safeguarding the planet.

3. Aesthetic Versatility

Composite fences are not just about functionality; they're a great way to inject a little personality.

Available in a wide range of colours, styles, and textures, they allow you to find the perfect fit for your outdoor space. Whether you all about the rustic charm of natural wood, or you prefer a sleek, modern design, composite fencing offers an array of options to suit.

4. Weather Resistance: Shielding Your Investment

Composite fencing excels in the weather-resistance department, as it’s designed to stand up to the harshest of weather conditions.

From blistering summer heat (rare, we know) to relentless downpours and even the most freezing of winters, your composite fence won't flinch. This remarkable weather resilience translates into a longer lifespan for your fence, sparing you the headache of frequent repairs and replacements.

So, come rain or shine, your fence will continue to look its best, year after year.

5. Maintenance Tips for Longevity

The beauty of composite fencing lies not just in its durability but also in its low maintenance requirements.

To keep it looking pristine, a simple clean is usually all that's needed; Regularly rinse off dirt and debris with a hose or pressure washer and use a soft-bristle brush for stubborn stains. With minimal maintenance, your composite fence will maintain its charm without the hassle.

6. Cost Comparisons: Traditional vs. Composite

We understand that budget considerations are often at the forefront of your decision-making process. While composite fencing may have a slightly higher initial cost compared to traditional materials like wood, it's important to consider the bigger picture.

Think of it as an investment in the future. With composite fencing, you'll save money in the long run.

Its low maintenance requirements mean no more painting, staining, or sealing, which means lower upkeep costs over time. Plus, its durability ensures that you won't be facing the expense of premature replacements. So, while the upfront cost may be a tad higher, the savings and peace of mind you'll enjoy are well worth it.


While traditional fencing has a timeless appeal, composite fencing takes things to the next level with its durability, versatility, and eco-friendly attributes. The decision between regular fencing and composite fencing ultimately hinges on personal preference, budget considerations, and the specific requirements of your property.

No matter which path you choose, we’ve got the goods. Visit our Fencing page to view our composite and traditional fencing options – and if you need a hand deciding, get in touch. We’re happy to help.

Blog Image
Dec 21, 2021
How can you improve the life of your roof? Our short-and-sweet roof maintenance checklist

Your roof is your home's first line of defence against the elements, so it's crucial to keep it in top shape, especially as neglecting roof maintenance can lead to costly repairs down the road.

To keep it simple, and to avoid taking time out of your precious weekends, we’ve produced this quick checklist as a guide to ensure your roof stays in good condition, for as long as possible.

But first…

Why Roof Maintenance Matters:

Before we dive in, let's understand why roof maintenance is so important:

  1. Preventing Leaks: Regular maintenance helps identify and fix small issues before they become major leaks.
  2. Extending Lifespan: A well-maintained roof can last significantly longer, saving you money in the long run.
  3. Preserving Curb Appeal: A well-kept roof enhances your home's appearance and value, making it more appealing if you decide to relocate.
  4. Safety: A sturdy roof protects your family from the elements and potential hazards – getting hit on the head by debris or lose tiles is never a good time.

Roof Maintenance Checklist:


1. Inspect Your Roof Regularly:

Check your roof at least twice a year, ideally in the spring and autumn, and keep an eye out for loose or missing slates or tiles, damaged flashing (the thin piece of metal which helps keep your roof watertight), and any signs of wear and tear.

If there’s a storm, make sure to check for any water damage or loose slates/tiles, as if left untreated these can lead to much bigger, and costlier, issues. Gaps and cracks can be sealed with roofing sealant to prevent water infiltration.

2. Clean Gutters and Downpipes:

Clogged gutters can lead to water damage, as they’re not able to do their job by diverting water and debris away from your roof. Clean them out regularly, and make sure your downpipes are directing water away from your house (or anyone else’s house, for that matter!).

3. Trim Overhanging Branches & Remove Debris:

Overhanging branches can scratch or damage your roof during heavy wind and storms. Keep them trimmed and out of the way, and remove any leaves, sticks, and other debris that may have accumulated, as this helps to prevent moisture retention and mould growth. Clean any moss-covered tiles with an environmentally friendly roof cleaning solution.

4. And finally…Check Your Vents:

Proper ventilation is essential for your roof's health – it needs to breathe to keep your insulation working as well as it should. Ensure vents are clear of moss, leaves and insulation and use an old paintbrush to remove any build up to get that air flowing freely again.

How to Clean Your Roof Safely:

When cleaning your roof, always prioritise safety:

- Use a sturdy ladder and have someone spot you.

- Wear non-slip shoes and safety gear.

- Use a soft-bristle brush to remove debris gently.

- Avoid pressure washing, which can damage shingles.

- If you don't feel confident, always seek the assistance of a professional contractor.


Regular roof maintenance is an investment in the longevity and safety of your home. By following this short and sweet checklist you can prevent expensive repairs and ensure that your roof continues to do its job for years to come.

If you ever need assistance, advice or roofing materials, don't hesitate to contact us - we're here to help.

Blog Image
Dec 21, 2021
Build Depot Partners with Ardgowan Hospice to Build a Brighter Future for Local Patients

Build Depot is proud to announce a new partnership with Ardgowan Hospice, a vital resource for people in Inverclyde who are living with life-limiting illnesses.

Ardgowan Hospice, based on Nelson Street in Greenock, are an independent local charity who provide free support to people in Inverclyde who are living with life-limiting illnesses such as cancer, heart failure, lung disease, kidney failure or neurological conditions. They rely on fundraising and donations to allow them to provide patients with personalised 1:1 care from the moment they are diagnosed until the end of life.

This exciting collaboration aims to support the hospice's mission of providing compassionate care and essential services to patients and their families.

Throughout the year, Build Depot will make a direct donation to Ardgowan Hospice for every bulk bag sold. This means that with every home improvement project undertaken by their customers, they'll be helping to build a brighter future for those facing challenging times.

For Mark Rodger, Build Depot's Managing Director, this partnership is personal. "We're more than just a building materials supplier," he says. "We've been part of the Greenock community for over 70 years, and we believe in supporting the organisations that make our town a stronger place. Ardgowan Hospice provided amazing and invaluable care to my grandfather when he needed it most around 20 years ago, and we're honoured to be able to say thank you, and support them and their work through this partnership."

By choosing Build Depot Greenock for their building needs, customers can feel confident they're not just investing in their homes, but also in the well-being of their community.

"A huge thank you to Build Depot for their compassionate contribution for every bulk bag sold." says Colette Cameron, Marketing and Communications Manager at Ardgowan Hospice. "This helps us provide invaluable support to individuals affected by life-limiting illnesses in Inverclyde. The generosity from Mark and his team is not only making a difference in the community but also bringing comfort and assistance to those facing challenging circumstances."

About Ardgowan Hospice

Ardgowan Hospice is a specialist palliative care service providing care and support to patients facing life-limiting illnesses and their families in Inverclyde. They offer a range of services, including in-patient care, day care, bereavement support, and spiritual care. Ardgowan Hospice is a registered charity and relies on the generosity of the community to continue its vital work.

Blog Image
Dec 21, 2021
Big News for Bathrooms in Greenock (and Beyond!)

We're thrilled to announce the grand opening of our brand-new Bath & Tile Studio showroom within Build Depot Greenock, making us a one-stop shop for all your bathroom needs.

And Greenock isn't the only place getting a makeover! Bath & Tile Studio showrooms will be opening soon within our Largs, Larkhall, and Dunoon branches, giving you convenient, local access to top-quality products, expert design services, and all the tiling supplies you could possibly need to create your dream bathroom.

Over 60 Years of Transforming Bathrooms

The Bath & Tile Studio team boasts over 60 years of experience in transforming bathrooms into beautiful and functional spaces. Whether you're a homeowner, a tradesperson working on a client's project, or a commercial customer, we can cater to all your needs under one roof.

But a successful bathroom project requires more than just tiles and tubs. That's why we’re offering a comprehensive range of services, including:

Expert Design Consultations: Our talented design team will work closely with you to understand your vision, preferences, and budget, creating a personalised bathroom design that exceeds expectations.

Vast Selection of Products: We partner with leading manufacturers like Roca, Aqualla, Hansgrohe, Geberit, and Crosswater, offering a diverse range of baths, tiles, showers, wet wall, faucets, vanities, and more – all designed to suit every taste and budget.

Seamless Project Completion: We work closely with local installers to ensure your bathroom project is completed to the highest standard, taking care of everything from product selection to after-sales support.

Head over to the Greenock branch of Build Depot today, explore the all-new Bath & Tile Studio showroom, and keep an eye out for further announcements as we gear up for the grand openings of our Largs, Larkhall, and Dunoon showrooms! 

Blog Image
Dec 21, 2021
Plans to build storage unit at Build Depot Greenock

We’re excited to announce that we’ve submitted a planning application for a new warehouse at our Head Office in Greenock. This expansion is crucial to support our continued growth and better serve our customers.

Our current warehouse is bursting at the seams! With a wider product range and increased demand, we need more space to operate efficiently. The new warehouse will allow us to:

Increase our product range: We’ll be able to stock a wider variety of products, giving you even more choice.

Improve efficiency: By centralising our stock, we can operate more smoothly and get your orders to you faster.

Create new jobs: This expansion will help us create more jobs in the local area, further strengthening our commitment to the community.

You might remember that earlier this year, we saved four local jobs after the collapse of a local bathroom supply business. Our new Bath & Tile Studio showrooms in Greenock, Largs and Dunoon have been incredibly successful, and we’re now working on opening our fourth showroom in Larkhall. To support this growth, we need a central hub for stock and distribution.

We’re confident that this new warehouse will benefit both our business and the local community. We’ll keep you updated on the planning process.

Watch this space!

Blog Image
Dec 21, 2021
How to Unblock a Sink

How to Unblock a Sink: Tools, Techniques & Solutions

A blocked sink can turn a simple task like washing dishes or brushing your teeth into a whole, painful ordeal. It’s one of those nuisances that tends to happen at the most inconvenient times. Whether it’s a build-up of food scraps in the kitchen or a mass of hair in the bathroom, sink blockages are a common household issue that many face.

Fortunately, unblocking a sink isn’t rocket science, and with a little bit of know-how, you can tackle this issue without calling in a plumber. Plus, taking care of it promptly not only saves you money but can also save your sanity.

Tools and Materials Needed

Before you roll up your sleeves, it’s best to gather everything you need. Having the right tools on hand will make the job a whole lot easier.

Essential tools for tackling a blockage:

- Plunger: A trusty companion for most sink blockages; just make sure it fits snugly over the drain.

- Drain snake (or auger): This handy tool can reach deeper blockages that a plunger might not be able to shift.

- Bucket: To catch any water that might spill over while you’re working.

- Old cloth or towels: Keep these handy to wipe up any messes and to help protect your surfaces.

Recommended cleaning solutions and alternatives:

- Baking soda and vinegar: A fantastic eco-friendly combo that works wonders on minor clogs.

- Commercial drain cleaner: If you’re in a bit of a pickle, these can be effective but always follow the instructions and use sparingly.


Identifying the Cause of the Blockage

When your sink starts behaving oddly, it’s usually trying to tell you something. One of the first signs to look out for is slow drainage; if you find that the water is taking ages to disappear, it’s likely that something is clogging the pipes.

You might also notice some gurgling sounds—those unsettling noises can be a clue that air is trapped because of a blockage. And let’s not forget about those nasty smells; if your sink starts to emit a funky odour, it’s a sure sign that food debris or other bits and bobs are stuck somewhere in the plumbing.

Being aware of these signs can help you catch any potential blockages early, making your life a lot easier down the line.

Common culprits:

- Hair: A frequent offender, especially in bathroom sinks, where it can easily accumulate and form a solid mass.

- Grease: In kitchens, leftover oils and fats can solidify in the pipes, creating a real mess.

- Food waste: Bits of food that sneak down the drain can pile up over time and create blockages.


Step-by-Step Guide to Unblocking a Sink

Alright, it’s time to get to work!

First, clear the area around your sink. Remove any dishes or cleaning supplies to give yourself space to work. It’s a good idea to place a bucket underneath to catch any spills, just in case.

Methods to remove the blockage:

- Using a plunger: Make sure there’s enough water in the sink to cover the bottom of the plunger. Position it over the drain and create a tight seal. Push down firmly and pull up quickly to create suction. Repeat this motion several times. If the blockage is dislodged, you should hear the satisfying sound of water draining away.

- Employing a drain snake: If the plunger isn’t doing the job, grab your drain snake. Feed it into the drain, twisting it as you go. When you hit the blockage, gently pull it back while twisting to grab any gunk. You might need to repeat this a few times to fully clear the clog.

- Using baking soda and vinegar: For a natural approach, pour half a cup of baking soda down the drain, followed by half a cup of vinegar. Let it fizz and bubble for about 15-30 minutes, then flush it with hot water. This method is great for breaking down minor clogs and freshening up the pipes.

- Once you’ve got the sink flowing again, run hot water for a few minutes to clear out any remaining debris. Wipe the sink down with a cloth to keep everything tidy and fresh.


Tips for Preventing Future Blockages

Now that you’ve unblocked your sink, it’s wise to think ahead to keep future issues at bay.

Best practices for sink maintenance:

- Regularly flush your drains with hot water to prevent build-up.

- Use a drain strainer to catch food waste and hair, making it easier to keep your sink clear.

- Steer clear of pouring grease or oil down the sink; instead, collect it in a container and dispose of it in the bin.

- Be mindful of what goes down the drain. Scraping plates before rinsing can help reduce food scraps entering your plumbing.

Unblocking a sink may seem like a chore, but with the right tools and techniques, it’s a task you can handle yourself.


If you need tools or cleaning supplies, why not pop into your local Build Depot in Greenock, Dunoon, Largs, or Larkhall? Our friendly staff are always ready to help you find just what you need. And if you prefer shopping online, visit build-depot.co.uk for a wide range of products at your fingertips.

Blog Image
Dec 21, 2021
How to Fix a Dripping Tap

Stop the Drip! DIY Guide to Fixing a Leaky Tap

There’s nothing more annoying than the relentless drip-drip-drip of a leaking tap. It’s a little sound that can quickly turn into a big headache, not to mention it can send your water bills skyrocketing over time.

But don’t panic! Fixing a dripping tap isn’t as daunting as it may seem. With a few tools and some straightforward steps, you can have that tap sorted in no time, saving yourself both money and hassle.

Tools and Materials Needed

Before you get started, it’s helpful to gather everything you need. Having the right tools on hand makes the whole process much smoother and quicker.

Essential tools for the job:

- Adjustable wrench: Perfect for loosening and tightening nuts and fittings.
- Screwdrivers: Both flat-head and Phillips, as you never know which one you'll need!
- Pliers: Great for gripping and turning any tricky components.
- Bucket or towel: To catch any drips or spills that might happen along the way.

Recommended replacement parts:

- Washers: If your tap is a compression type, you’ll probably just need to replace the washer.
- O-rings: Essential for cartridge taps, these help prevent leaks at the joints.
- Cartridges: If you have a cartridge tap, you might need to swap out the entire cartridge.


Identifying the Type of Tap

Now that you’re equipped and ready, it’s time to figure out what type of tap you’re dealing with. Knowing this will guide you through the repair process.

Overview of common tap types:

- Compression taps: These have separate hot and cold handles and work by using rubber washers that compress to stop the flow.
- Cartridge taps: These have a cartridge inside that controls the flow of water and can be removed and replaced as a unit.
- Ball taps: Usually found in kitchen sinks, these have a single lever that controls hot and cold water through a rotating ball.
- Ceramic disc taps: These taps use two ceramic discs that slide against each other to manage water flow and temperature.


Step-by-Step Guide to Fixing a Dripping Tap

Ready to get your hands dirty? Here’s a step-by-step guide to fixing that tap.

1.      Turning off the water supply: First things first, you need to stop the water from flowing. Find the shut-off valves under your sink and turn them clockwise. If you can’t find them, don’t panic—just turn off the main water supply for the house.

2.      Disassembling the tap: Next, it’s time to take the tap apart. Use your screwdriver to gently remove any decorative caps to access the screws underneath. Take off the screws and carefully pull off the handle. You might need to use your adjustable wrench to loosen any nuts that are holding it in place.

3.      Replacing washers or cartridges: Now that you have the tap disassembled, take a good look at the components. If you’ve got a compression tap, replace the old washer with a new one. For cartridge taps, simply pull out the old cartridge and pop in the new one, making sure it fits well.

4.      Reassembling and testing the tap: Once you’ve replaced the necessary parts, it’s time to put everything back together. Reassemble the tap in the reverse order of disassembly. After everything is back in place, turn the water supply back on and check for any leaks. Give the tap a good turn on and off to ensure it’s working smoothly.


Tips for Preventing Future Drips

Now that you’ve got your tap fixed, it’s wise to take a few steps to keep future drips at bay.

Make it a habit to check your taps every now and then for any signs of wear. Tightening any loose fittings and replacing worn washers or cartridges before they fail can save you a lot of trouble down the line.

When you’re replacing parts, opt for high-quality washers and cartridges. They may cost a bit more initially, but they’ll last longer and save you from the hassle of frequent repairs.

Fixing a dripping tap might seem like a small job, but it can make a world of difference in your home. Not only will it restore some peace and quiet, but it can also help you avoid unnecessary costs on your water bill. With a little patience and the right tools, you can tackle this DIY project with confidence.


If you need tools or cleaning supplies, don’t hesitate to swing by your local Build Depot in Greenock, Dunoon, Largs, or Larkhall. Our friendly staff are always on hand to help you find what you need. Plus, you can shop online at build-depot.co.uk for even more convenience.

Blog Image
Dec 21, 2021
Bathroom Design Trends - Winter 2024

With the rising cost of living prompting many of us to rethink our housing choices, investing in our existing homes has become not just practical but also deeply rewarding. Rather than embarking on a costly move, why not transform your bathroom into a relaxing space to escape?

What’s great is that you don’t need to spend a fortune to make a big difference. Sometimes, it’s the little updates that can have the most significant impact. Change out your taps for something a bit more stylish, or refresh the walls with a soothing new colour - these little tweaks can give your bathroom a whole new look.

Trending Colours for Winter 2024

This season, we’re seeing a shift towards colours that bring calm and comfort into our homes. Soft, muted shades like sage green, dusty blue, and warm terracotta are really making an impact. These hues not only create a calming vibe but also help to bring the outdoors in.

Rich colours like emerald green or plush aubergine can instantly elevate the look of your bathroom. When paired with luxurious finishes - think brushed gold taps or sleek marble countertops - you can create a stunning space that feels like a five-star hotel. It’s all about making your bathroom a place where you feel pampered and relaxed, providing an escape from the daily grind.

Adding layers of light - like dimmable fixtures or softly glowing LED strips - can enhance the atmosphere even further. The combination of light and dark colours creates a dynamic environment that feels both inviting and calming.

Innovative Materials

Sustainability continues to be a significant trend in home design, and bathrooms are no exception. Eco-friendly materials such as bamboo, recycled glass, and reclaimed wood are making waves this winter. These materials not only reduce your carbon footprint but also add unique textures and character to your space. For instance, bamboo vanities or recycled glass tiles can introduce a touch of nature and elegance into your bathroom.

In addition to sustainable options, textured finishes are gaining popularity. Think about incorporating elements like textured tiles or wood panelling to add depth and interest to your bathroom. These finishes can create a tactile experience that enhances the overall aesthetic. For example, a matte finish on tiles can contrast beautifully with glossy fixtures, creating a dynamic visual effect that captivates the eye.

Layout and Space Optimisation

As bathroom designs evolve, the debate between open layouts and compartmentalised spaces is gaining traction. Open layouts promote a sense of spaciousness, making small bathrooms feel larger and more inviting. They often incorporate features like glass showers and freestanding bath tubs to enhance this airy feel. On the other hand, compartmentalised spaces allow for privacy and functionality, making them suitable for families or shared bathrooms.

Tips for Maximising Small Bathrooms

For those with limited space, clever design choices can make all the difference. Consider installing wall-mounted vanities to free up floor space or opting for mirrored cabinets to enhance light and create an illusion of depth. Additionally, utilising vertical storage solutions, such as shelves or tall cabinets, can help keep your bathroom organised without sacrificing style.

Technology Integration

Technology is increasingly becoming an integral part of bathroom design. Smart bathrooms equipped with automated features are on the rise. From sensor-activated faucets to programmable shower systems, these innovations offer convenience and luxury. Imagine stepping into a shower that’s already set to your preferred temperature or having lights that adjust to your mood with a simple command.

Alongside smart technology, energy-efficient fixtures are making their mark this winter. Low-flow toilets, touchless faucets, and LED lighting not only reduce your environmental impact but also save you money on utility bills. When choosing fixtures, look for products that boast energy efficiency ratings to ensure you’re making a sustainable choice without compromising on style.

As we embrace the bathroom design trends for Winter 2024, it’s clear that style, sustainability, and technology are at the forefront. By incorporating trending colours, innovative materials, smart technology, and clever layouts, you can create a bathroom that’s both beautiful and functional.

If you're inspired to revamp your bathroom this winter, why not visit your local Build Depot branch? Each location features a dedicated Bath & Tile Studio showroom, where you can explore an array of stunning options. Our experienced bathroom designers are on hand to guide you through the process and help you bring your vision to life. Best of all, you can book a free appointment at your convenience by visiting Bath & Tile Studio.

Blog Image
Dec 21, 2021
Loft Conversions: Making the most of your home’s potential

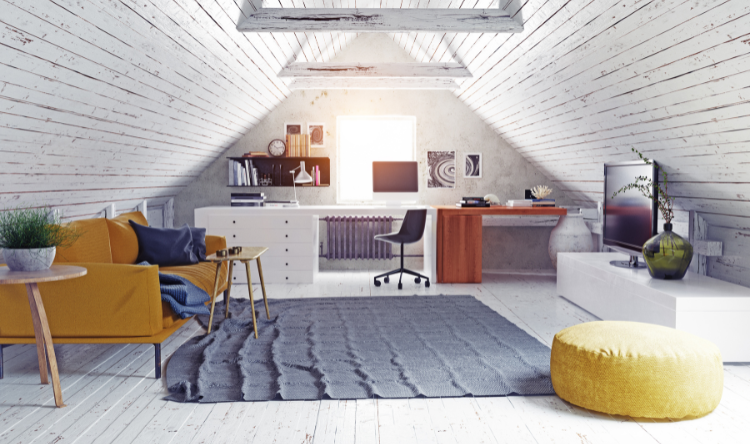
With the constant increase in living costs, many homeowners are feeling the pinch and looking for smart ways to make the most of their existing properties. With the shift towards remote work becoming increasingly permanent for many, the need for additional usable space at home has never been more crucial. A loft conversion can provide a brilliant solution by transforming that neglected attic into a functional area—whether it’s a dedicated home office, a snug extra bedroom, or a creative playroom for the kids.

Instead of moving to a larger house, which can be both costly and stressful, why not build upwards? A loft conversion not only gives you the extra space you need but can also significantly boost your home’s value. It’s a practical and stylish way to adapt to the changing needs of your household, ensuring that your home remains a comfortable and versatile place to live, work, and grow.

Types of Loft Conversions

When it comes to loft conversions, there’s a style to suit every need and taste. Here’s a rundown of some of the most popular options:

Dormer Loft Conversions

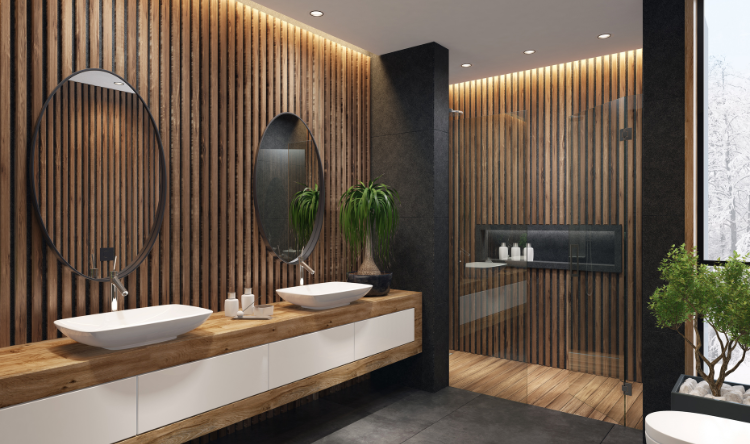
Dormer conversions are a favourite among many homeowners. They involve adding a box-shaped structure that pops out from the sloping roof, creating lots of extra headroom and floor space. This type of conversion is ideal for crafting stylish and spacious bedrooms or even a delightful bathroom retreat.

Hip-to-Gable Conversions

If you live in a house with a hipped roof, a hip-to-gable conversion might be just what you need. By extending the sloping side of the roof to create a vertical gable end, you can maximise both space and natural light. It’s particularly well-suited for family homes that need a bit more room to breathe.

Mansard Loft Conversions

For those wanting to go all out, a mansard conversion is a fantastic option. This style involves modifying the existing roof structure to create a flat top and steep sides, giving you a generous amount of living space. While it can be a bit more complex and often requires planning permission, the stunning results are well worth the effort.

Roof Light Conversions

If you’re after something simpler and more budget-friendly, a roof light conversion could be right up your alley. This approach involves adding roof windows without making significant changes to the roof structure, allowing lovely natural light to flood in while keeping the roofline intact.

Planning and Regulations

Before diving into a loft conversion, it’s important to get your head around the planning and building regulations involved.

Building regulations are there to ensure any work meets safety and energy efficiency standards. This covers everything from structural integrity to fire safety and sound insulation. It’s crucial to stick to these regulations to keep your conversion safe and sound for years to come.

Many loft conversions require planning permission, especially if you’re making significant structural changes. It’s a good idea to have a chat with your local planning authority to find out what you’ll need to do for your project. Interestingly though, not all loft conversions need planning permission. If your project falls under permitted development rights—meaning it doesn’t exceed specific limits—you might be in luck. Generally, this means staying within height thresholds and ensuring the conversion blends in well with the local area.

Choosing the Right Materials

Selecting the right materials for your loft conversion is a crucial step that can greatly impact the project's success, durability, and overall aesthetics. It’s not just about choosing what looks good; you need to consider functionality, safety, and cost-effectiveness. Here’s a thorough breakdown of the essential materials you’ll need and some tips on sourcing them.

Some key materials to consider include insulation, roofing, flooring, and interior finishes. Good insulation is essential for keeping your loft cosy and energy-efficient. Plus, sturdy flooring will ensure your new space is safe and long-lasting.


Essential Materials for Loft Conversions
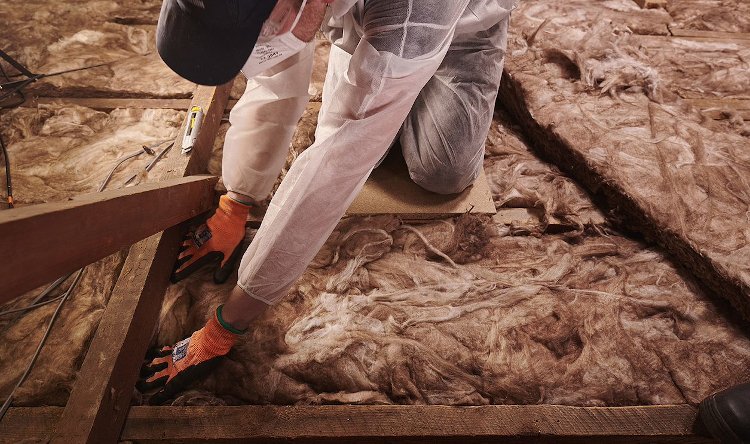
Insulation

Good insulation is vital for any loft conversion, as it helps maintain a comfortable temperature throughout the year, reducing energy costs. You'll typically want to use a combination of roof insulation, which can be installed between and over the rafters, and floor insulation to keep the living space cosy.

Common options include mineral wool, rigid foam boards, and spray foam. Mineral wool is popular for its excellent thermal performance and soundproofing qualities, while rigid boards provide high insulation values in thinner profiles. Spray foam offers a seamless installation and can fill in gaps effectively, but it tends to be more expensive.
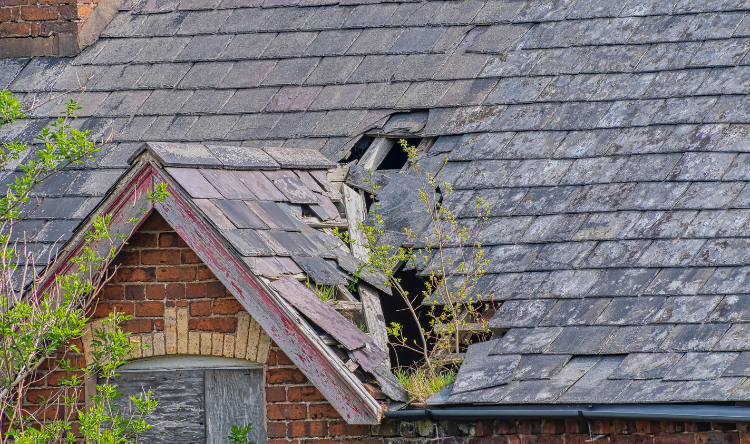
 

Roofing Materials

If your conversion involves any changes to the roof structure, you'll need quality roofing materials to ensure it’s watertight and durable. Depending on the existing roof, you may require tiles, slates, or a flat roofing system.

  • Tiles and Slates: Clay or concrete tiles are common choices for pitched roofs due to their durability and aesthetic appeal. Slate offers a more classic look but can be pricier.
  • Flat Roofing Systems: If your loft conversion includes a flat roof, materials such as EPDM (Ethylene Propylene Diene Monomer) rubber or GRP (Glass Reinforced Plastic) are excellent choices, offering long-lasting waterproofing.

Flooring

When it comes to flooring, you'll want something that’s not only attractive but also sturdy enough to handle foot traffic. Depending on the intended use of the space, options include laminate, engineered wood, or carpet.

  • Laminate Flooring: This is a budget-friendly option that mimics the look of wood without the hefty price tag. It’s durable and easy to clean, making it ideal for a family space.
  • Engineered Wood: For a more luxurious feel, engineered wood provides the beauty of solid wood with added stability. It's particularly beneficial in loft spaces where temperature fluctuations can affect traditional hardwood.
  • Carpet: If your loft is going to be a bedroom or a cosy den, carpet can add warmth and comfort underfoot. Just ensure that the underlay is of good quality to improve insulation and sound absorption.
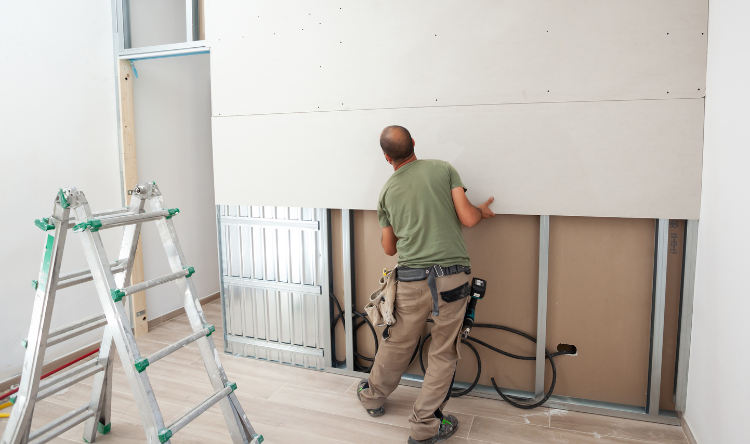
Interior Finishes

Once the structural elements are in place, the interior finishes will bring your loft conversion to life. This includes everything from wall materials and paints to fixtures and fittings.

  • Walls: You’ll typically use plasterboard for internal walls, which is easy to install and provides a smooth surface for painting. For added character, consider adding wooden panelling or exposed brick in certain areas.
  • Paint: Opt for paints that are durable and easy to clean, especially in high-traffic areas. A good-quality, washable emulsion is ideal for family spaces.
  • Fixtures and Fittings: Choose fixtures like lighting, switches, and sockets that match your overall aesthetic. Consider energy-efficient LED lighting to keep electricity bills in check.

Cost Considerations for Materials

Cost is an important factor in any building project, and loft conversions are no exception. Here are some tips for budgeting effectively:

  • Set a Realistic Budget: Start by outlining your overall budget for the loft conversion. Factor in all materials, labour, and any unexpected costs that may arise.
  • Prioritise Quality: While it might be tempting to cut corners with cheaper materials, investing in quality items can save you money in the long run by reducing the need for repairs and replacements.
  • Shop Smart: Look out for sales, discounts, or bulk buying options at Build Depot. Our regular promotions can help you save on essential materials without compromising on quality.

DIY vs. Professional Help

One of the biggest decisions you’ll face is whether to tackle the project yourself or bring in the professionals.

If you’re handy with DIY and enjoy getting your hands dirty, you might consider taking on some of the work yourself. Tasks like painting, flooring, and basic insulation can be within your reach if you’re up for the challenge.

However, hiring professionals can save you a lot of hassle and ensure the work is done to a high standard. Skilled builders and contractors know the ins and outs of loft conversions, so they can help navigate any tricky bits and make sure everything meets the necessary regulations.

If you decide to go the professional route, clear communication is key. Share your vision, set realistic timelines, and agree on a budget from the start. This will help create a positive working relationship and keep everything on track.
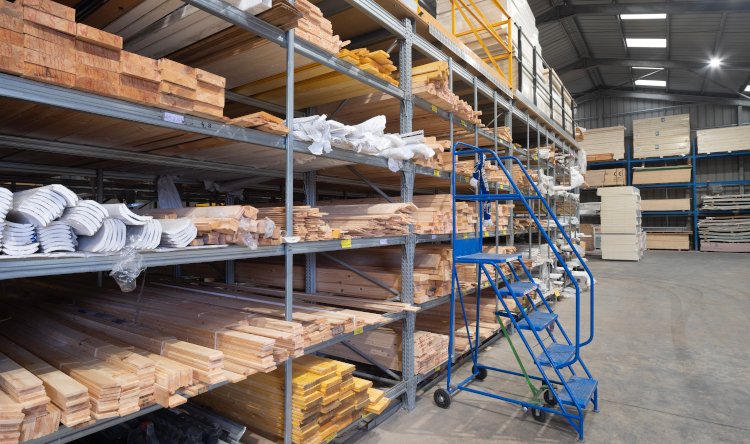
Sourcing Materials

When it comes to finding the right materials, Build Depot is your go-to. We stock a comprehensive range of products designed specifically for loft conversions. Whether you’re looking for insulation, roofing materials, or stylish interior finishes, our branches in Greenock, Dunoon, Largs, and Larkhall have everything you need.

Shopping online at build-depot.co.uk also offers the convenience of browsing our extensive inventory from the comfort of your home. Our knowledgeable staff are always on hand to provide expert advice, helping you make the best choices for your project.

Build Depot©™ is a trademark of Build Depot Limited, 2024. All rights reserved. Registered in Scotland No. 172887